Driver's Backrest for a 2002 Yamaha V-Star 650 CustomModification done by ChaplainDick revddick@optonline.net
|
After concluding that there were no Driver's Backrests that would fit the set up on my ride following a fairly extensive internet aftermarket parts suppliers, I decided to try to fabricate one on my own. The main considerations were that mounting brackets could not interfere with or require the re-design of the Rixon-Kaul Quick Release saddlebag mounts (similar to KlicBag saddlebag mounting system) that I had already installed, nor could they interfere with the saddlebags themselves. A design criteria was that I wanted the backrest to be removable should I not want to use it on a particular occasion.I first had to find backrest mounting brackets that would work in the application and a search of EBay yielded a Kawasaki Passenger Backrest with rather compact mounting brackets that I thought could be modified to work. The measurement for the frame width and mounting brackets seemed to be close enough to what I needed for mounting on the front fender stay bolts.Since the backrest frame and pad were similar enough in design to the stock Yamaha Passenger Backrest already on the bike, I decided to go ahead and bid on the item. I turned out to be the winning bidder.
This bracket will fit the following models:Kawasaki Nomad 1500: model years1999-2004
|
SB-1 - Left side showing the Rixon-Kaul Quick Release saddlebag mounting support mounted to an aluminum plate that utilizes the stock fender mounting holes and allows for mounting the bag support level. |
 |
SB-2 - Picture of the right side saddlebag mount attached to the saddlebag support bars and how the front bolt location was used to find the level point for the rear support bolt. The hole in the upper left of the aluminum plate is where the rear fender bolt attaches. |
 |
SB-3 - Left side saddlebag showing the Quick Release mount attached to the bag. |
 |
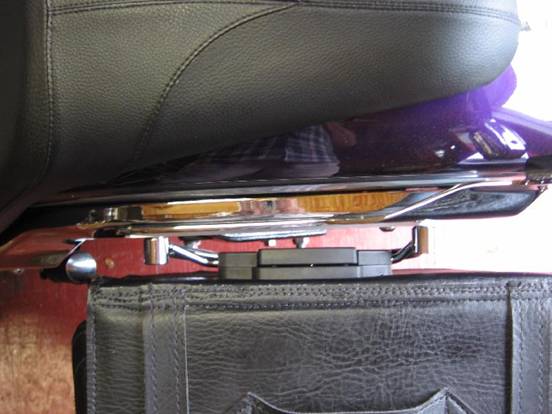
SB-4 - A birds eye view of the left side saddlebag attached to the saddlebag support bracket. The chrome colored object at the left rear of the saddlebag is the Passenger Foot Peg which has been removed since this photo was taken. Picture shows the space available between the forward saddlebag support fender bolt and the rear of the bag. |
 |
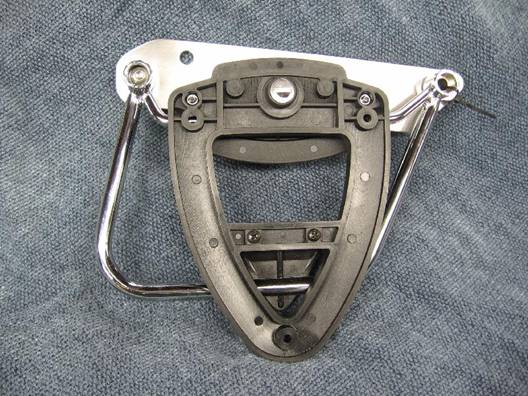
I next determined how much to cut off the front part of the bracket by placing a piece of 90 degree bent rod on the back of the bracket and extending downward, as far as possible, to hook under the fender stay. I had decided that I did not want to drill any holes in the fender stay! A second bend was needed to match the angle of the rod to the front edge of the mounting bracket.
To simplify making these stabilizing rods, I purchased two rubber coated, heavy duty ladder hangers and cut off the rubber padding. Starting at the bent end (without the screw threads) I placed the leg of the bend under the fender stay in line with the front left lower corner (left side) and marked the spot to place a slight bend in the rod to bring the upper portion in line with the front edge of the mounting bracket. You can get an idea of the overall length of this rod by looking at the pictures that follow. The left over portion of the rod was used to make the bracing piece.
I temporarily held the stabilizing rods, in place, to the modified bracket with a spring clamp. These rods would serve to stabilize the bracket and prevent the backrest from rotating backward when leaned on. I also wanted to fix a brace for the bracket stay to prevent bending the stay with excessive backward pressure. Hence the final design!
I brought the modified brackets to a welder and then smoothed out the welds with a Dremel tool using a carbide bit as well as hand filing and sanding. The trimmed up brackets then went to be chrome plated.
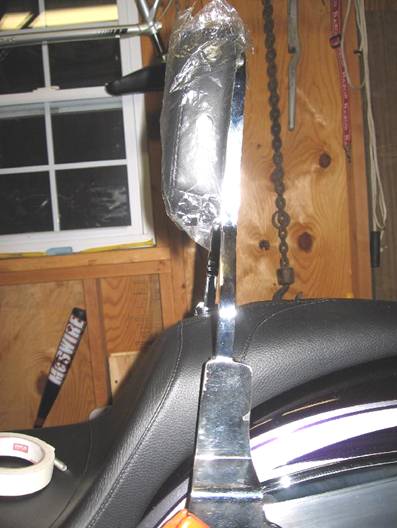
BR-1 - Initial fitting of the now modified MC Enterprises backrest mount for a Kawasaki onto the back fender of a V-Star 650 Custom. The rods are sections from garage organizer coated heavy duty ladder hangers) |
 |
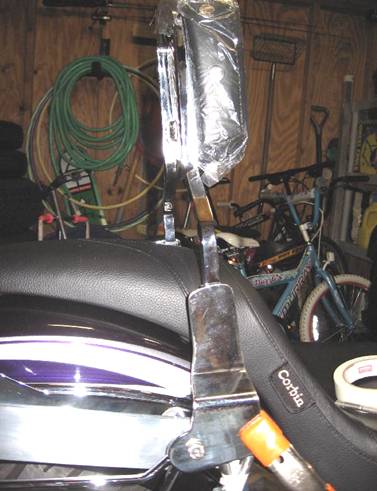
BR-2 - Another view to get the backrest angle set. An initial angle was set and I then sat on the bike to determine how the back rest felt (don't apply too much backward pressure, though, as the rods can move. |
 |
BR-3 - Another view taken looking rearward - showing the location of the bracket reinforcing rod. |
 |
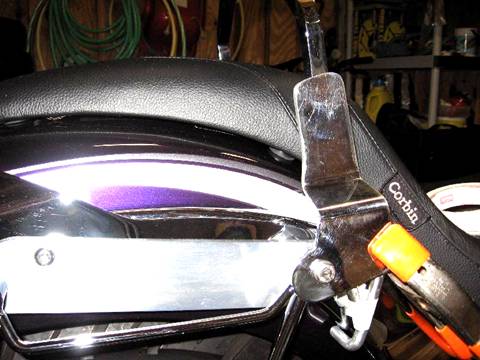
BR-4 - A view of the left side. The back rest frame serves to align the angles of the two mounting brackets. |
 |
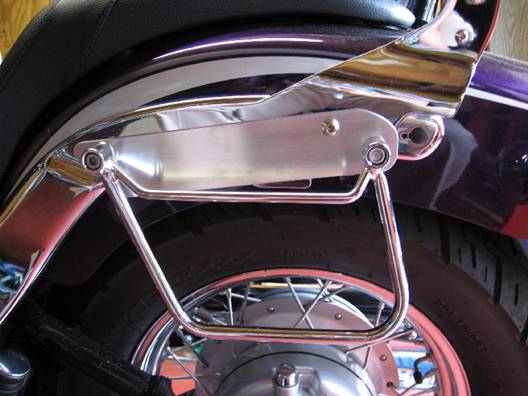
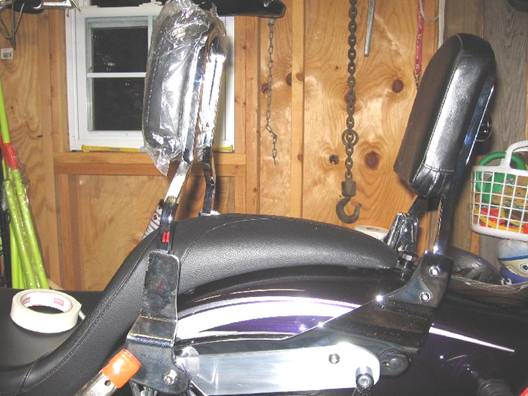
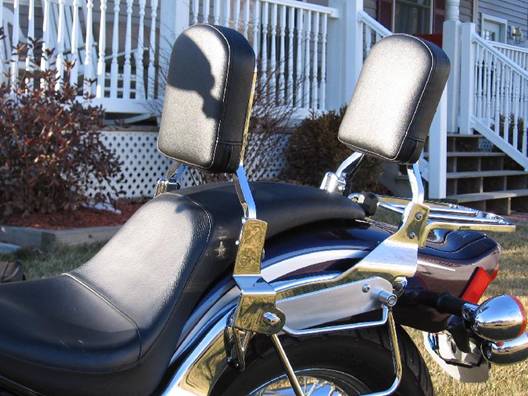
BR-5 - A wider view showing the relative position of the drivers backrest to the passenger backrest and how the mounting brackets do not interfere with the KlicBag brackets. |
 |
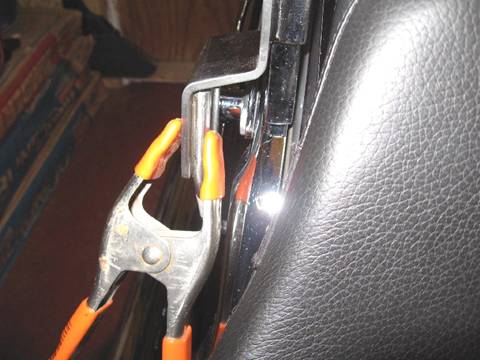
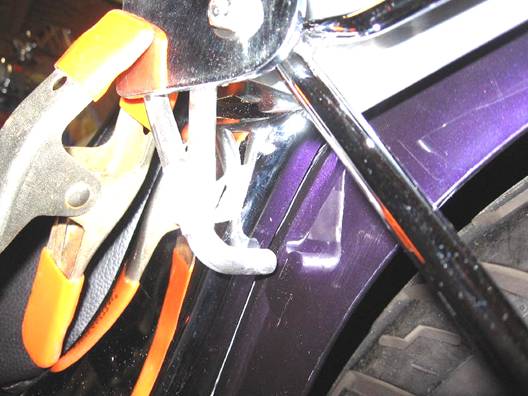
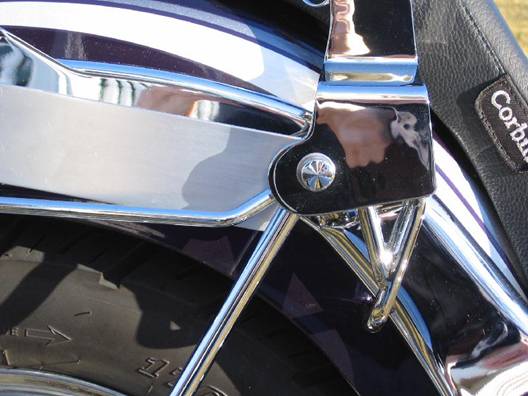
BR-6 - A close up view showing how the rod engages the underside if the fender strut which serves to stabilize the mount. The finished mount will have black vinyl electricians tape wrapped around the rod a couple of wraps will do it - to prevent any marking of the chrome fender stay |
 |
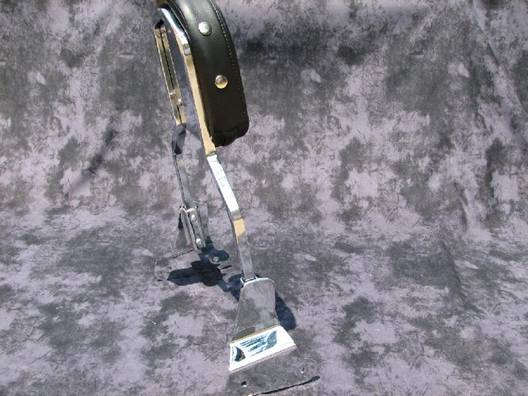
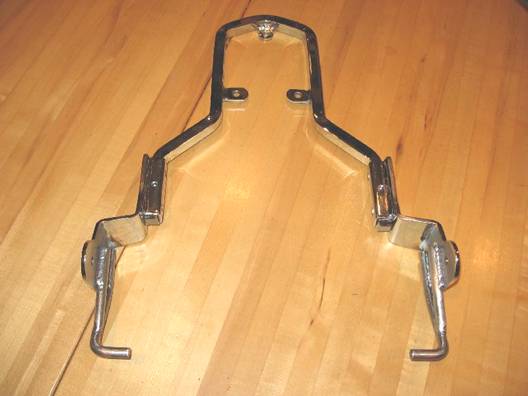
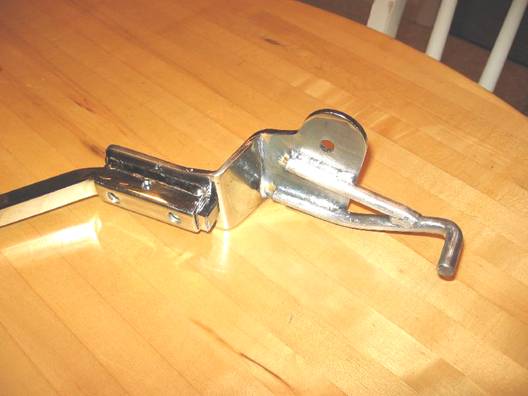
BR-7 - Brackets have been welded and the welds smoothed off prior to being chrome plated. The height of the backrest was shortened, as well, and the backrest frame was modified to be quick release by drilling a ź hole through the U channel and square frame through which a ź Hitch Pin will be placed to both secure the frame to the mounts and to allow for easy removal of the backrest. |
 |
BR-8 - Another view of the modified backrest frame and mounting brackets. |
|
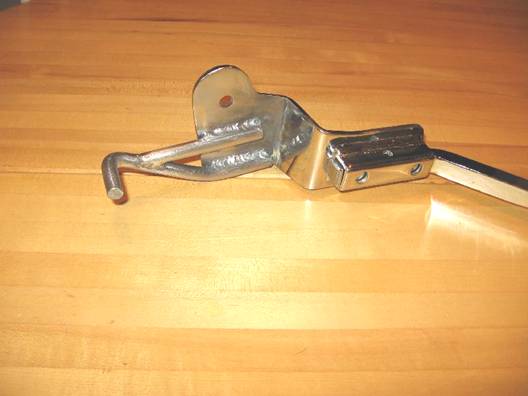
BR-9 - A close up view of the right side mounting bracket. Note the ź hole in the top of the U Channel for the ź Hitch Pin. |
 |
BR-10 - A similar view of the right side mounting bracket. |
 |
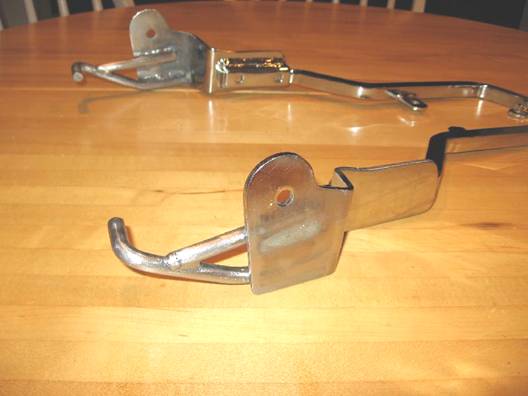
BR-11 Another view showing the two mounting brackets. |
 |
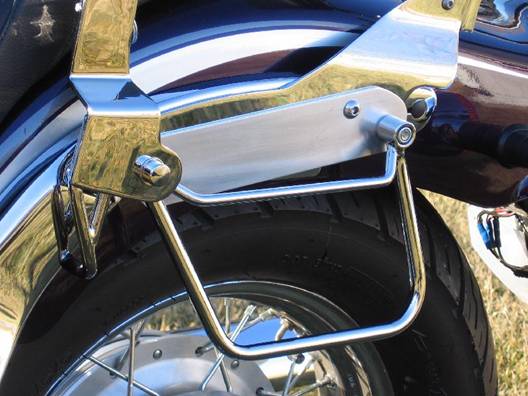
BR-12 Completed left side bracket installed on bike incorporating the mod for the Rixon-Kaul Saddle Bag mounting |
 |
BR-13 Installed as viewed from the right side. |
 |
BR-14 Close up view of right side mount |
 |
BR-15 The completed installation including new Yamaha Back Rest Pads |
 |
BR-16 A view from the rear showing the Quick Detach feature using ź Hitch Pins to disengage the back rest frame from the bracket |
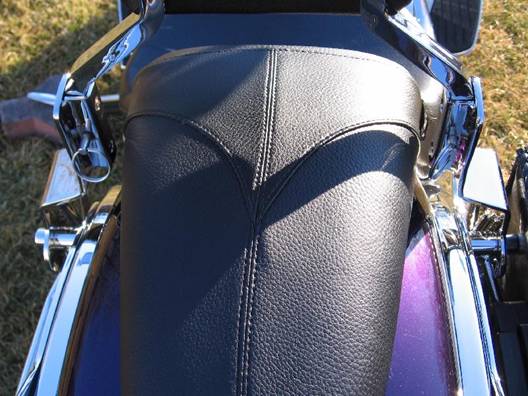 |
BR-17 A Bird's Eye view of the left side |
 |
BR-18 A view of the left side with the saddle bag installed |
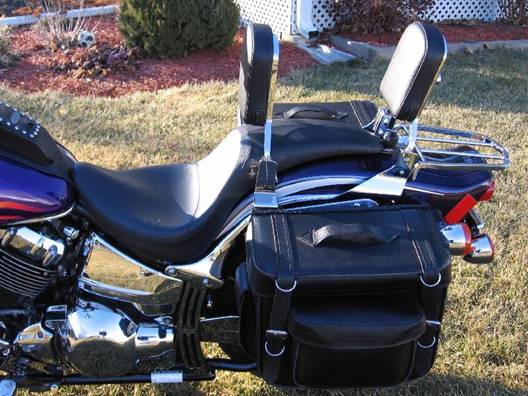 |
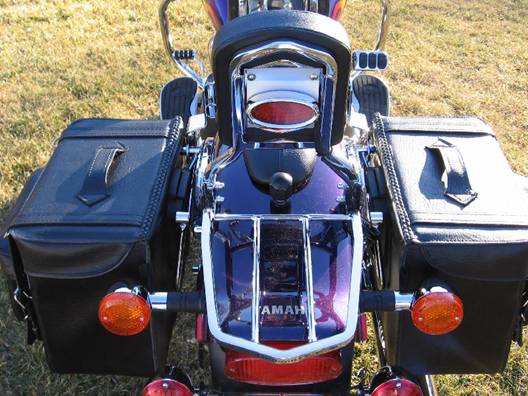
BR-19 A view from the rear showing both saddle bags installed as well as the Yamaha Luggage Rack |
 |