-
To check the pickup coil, disconnect the pickup coil coupler from the wire harness. The wires are gray and black. Connect an ohm meter or pocket tester (set on ohms x 100) to the terminals, + goes on gray and - on black. It should resistance should be between 182 to 222 ohms. Normally a coil will not short so the resistance will be almost infinite which means it is open. So if it is well below this or greatly higher the coil needs to be replaced.
Replacing the Pickup Coil
-
Remove the oil
-
Remove the seat
-
Remove the tank
-
Remove the left side crankcase cover
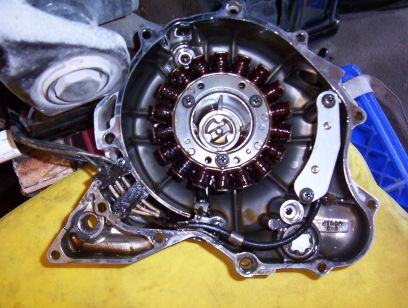
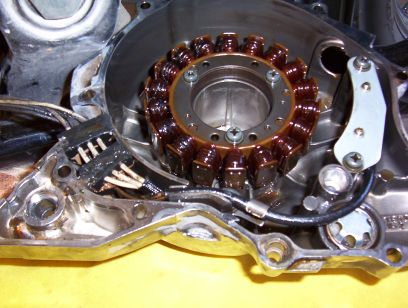
Here are pictures of the inside of the crank case cover. The Stator coil is in the center and the Pickup coil is on the right and is removed by taking out the two screws.
Replace things in the reverse order in which they came off.
Here are some more info by Kravenmorehead
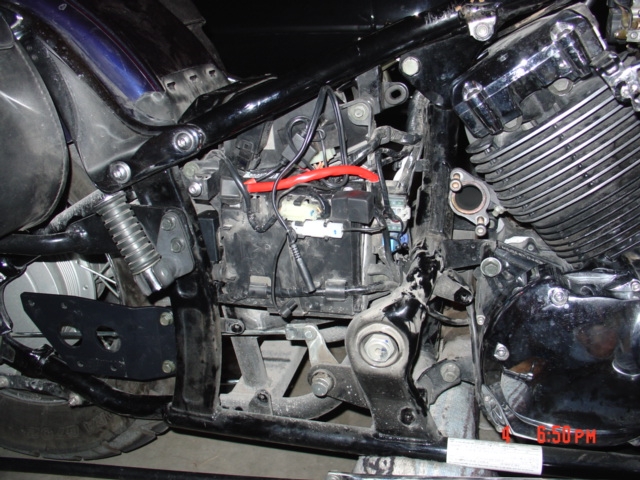
The first pic is a view of the wire harness coupler for the stator and the
pickup coil. The pickup coil coupler is the one with two wires (one black
with a blue stripe and the other a light gray). They are both behind the
rear ignition coil. The pickup coil assembly wiring runs down the frame
down-tube in front of the shock mount. This is the side of the harness that
pickup coil. Access to the zip ties holding the wires to the frame required
removing a lot of stuff to cut them in order to remove the pickup coil wire
harness.
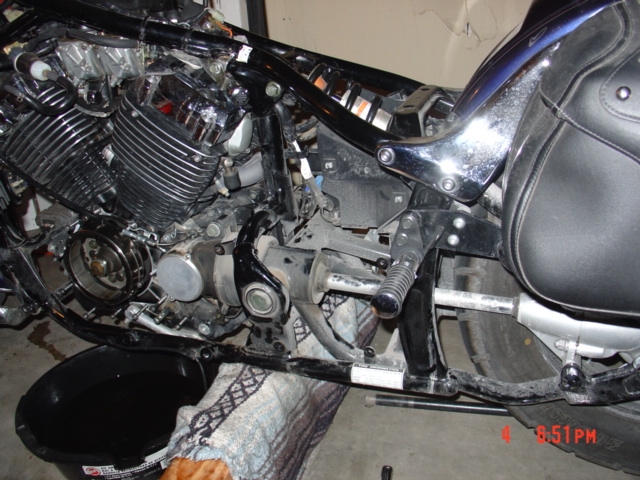
The second pic is just a view of the side with everything that was removedin order to cut the wire ties and remove the old pickup coil wire harness.Here's a list of what was removed;-Both seats-Speedo housing -Fuel tank-Side covers-Tool kit storage box-Middle gear cover-Tranny cover
-Floorboard and shift linkage (there's a mark on the shaft to re-align it properly) -Kickstand and bracket -And finally, the left-side crankcase cover
Keep track of what bolt goes where on the crankcase cover as they are of
different lengths and must go back in the correct holes.

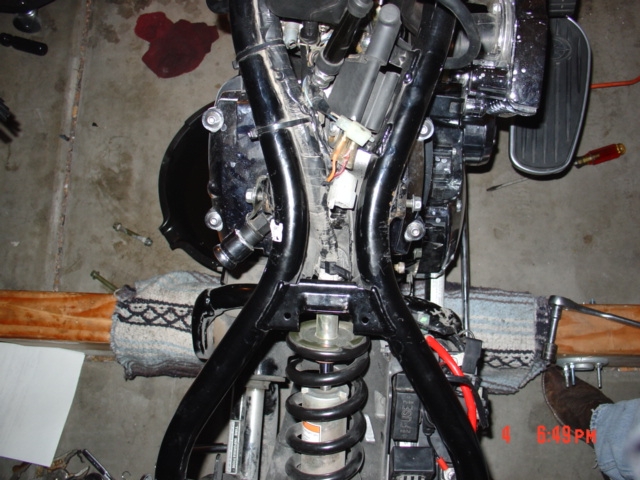
Pics 3 and 4 show the right-side of the bike with all the stuff that was removed. -Exhaust -Tranny cover -Side cover. I had just replaced the battery and I managed to not need to remove the battery and it's box but, you may find it easier to remove all this. I also needed to remove the forward shock mounting bolt to reach one zip tie. You may not need to do this.
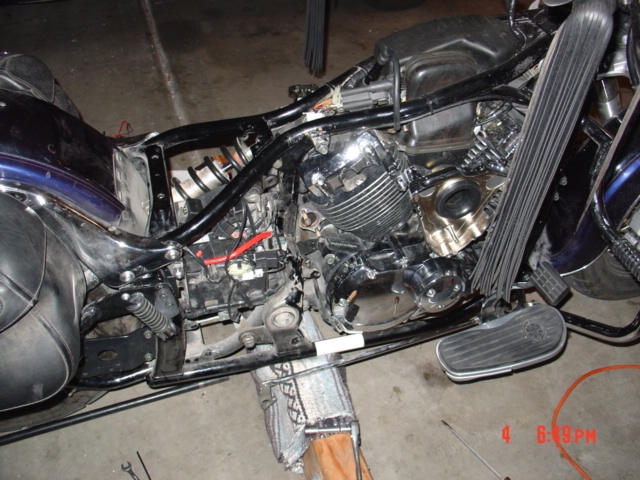
Pic 5 is just another view of the left-side.
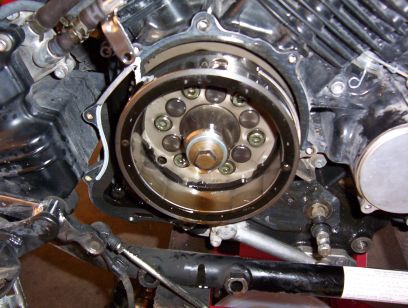
Pic 6 is the left-side of the crankcase with the cover removed. I placed
the bolts back in their respective holes so as not to lose track of what
goes where. I used a scraper blade to clean off the old paper gasket. Just
be careful not to severely scratch the surfaces and keep the pieces of the
old gasket out of the engine! I imagined oil leaks afterwards but I've not
had any.

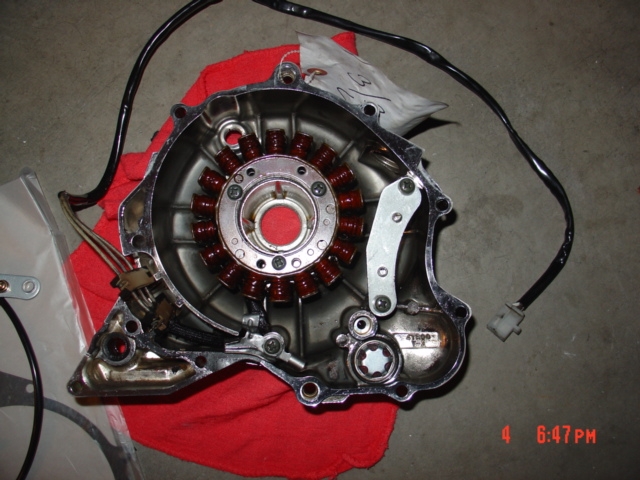
Pic 7 is the inside view of the crankcase cover. This was when it came back
from the shop getting a screw extracted so, the wire you see is for the
stator (pickup coil wasn't installed yet). By the way, the two
Phillips-headed screws holding the pickup coil mounting bracket have thread
locker on them and you will most likely need vise grips and you will shear
the screws if you don't use heat to soften the locker, hence being in the
shop ;). I'm told a small torch for a few seconds will work. Be careful not
to heat the stator! It will cost you about $300 to replace! The
crescent-shaped bracket with the two Phillips-headed screws is the pickup
coil bracket. The pickup coil mounts to the underside of this bracket using
screws. (I don't know why these didn't have thread locker on them).
Getting the crankcase cover to come off requires some finagling. It will
likely resist coming off. I just gave it a few taps with a padded hammer.
But be careful! A cracked cover will cost you plenty! Also, there's rubber
grommets on both the stator and the pickup coil wires. They fit into a slot
in the cover; one on top of the other. These must've had an adhesive on them
cause they were sticking to the case and each other. This made it a little
difficult to remove them and is why I recommend cutting the wire ties first
and bring the wire harness to the left-side of the bike to make the slack
needed to remove the crankcase cover. Pay attention to where everything came
from and you'll be all right.
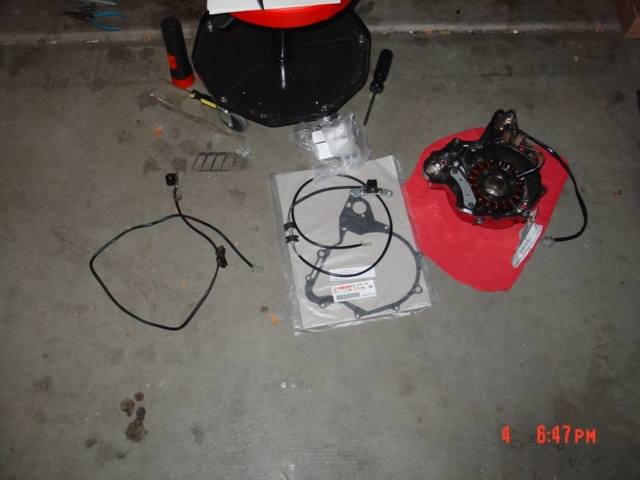
Pic 8 is the bad pickup coil on the left, the new pickup coil and paper
gasket in the middle and the crankcase cover on the right.
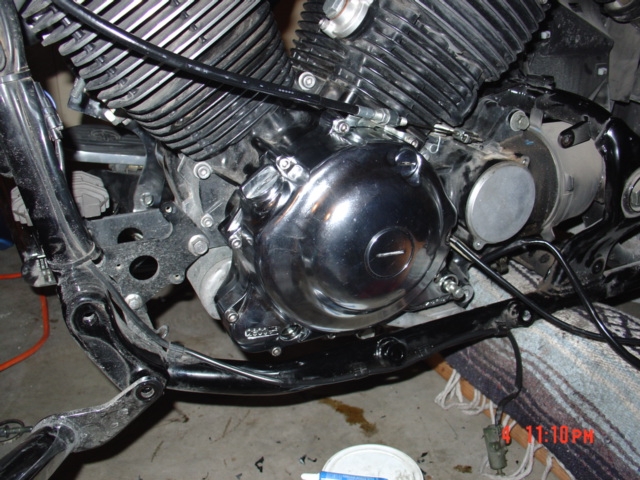
Pic 9. This is a view of the crankcase cover put back on. Make sure all the
bolts are in the right holes and don't over tighten the bolts. When I
installed the new pickup coil, I used a little bit of High-temp RTV sealant
\on the rubber wire grommets in the grooves and sandwiched between each
other. They looked like they sat right at the oil level and I was concerned
they would leak when the bike got hot. Also, re-lube the shifter-shaft with
Lithium grease. And don't forget to use more thread-locker on the
phillips-headed pickup coil bracket screws. (you don't want one vibrating
loose and flying around your engine,.... they won't fly for very long, if
you're lucky, the magneto will catch it and the engine will quit with the
pickup coil off it's mount)
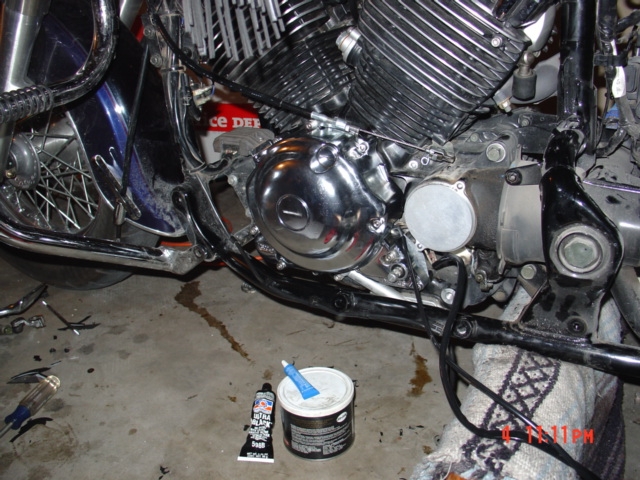
Pic 10 is another view of the re-installed crankcase cover. At the bottom
is the RTV sealant and the lithium grease and the thread locker I used.
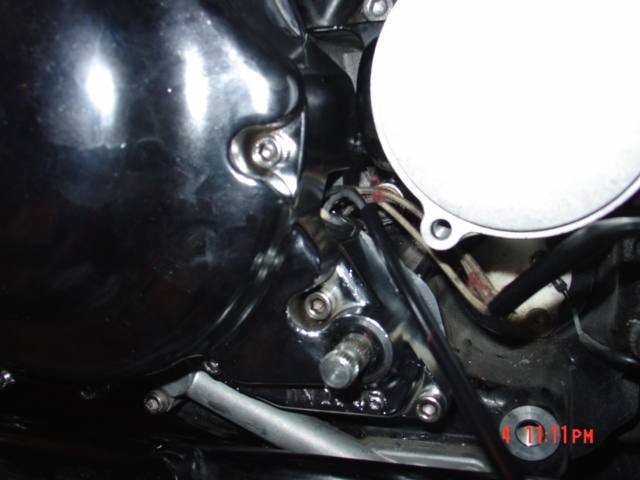
Pic 11 is a close-up of the wires coming out of the case cover at the
grommets. If these wires are worn or in any way sub-par, shield them or else
you may need to get down there again later on to do it anyway.
|
|