Hyper charger by Ron Weiser and the Green Mamba
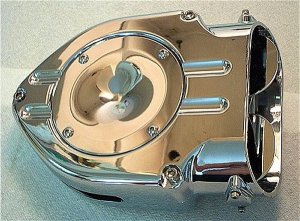 |
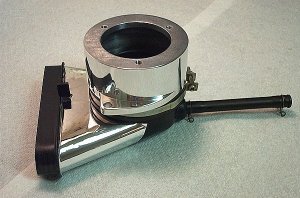
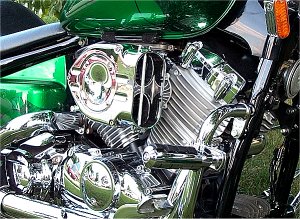
The Thunder Manufacturing Hyper Charger with the standard cover plate and butterflies. It's a very nice piece of equipment! |
Jeff Sweigart did all the setup and tuning details on this page are a result of his efforts. He's helped a lot of people install and set up their Hyper Chargers. In fact, with his help, You will be able to re-jetted the carbs to his specifications, installed the Hyper Charger, start the bike and drive away! How much easier does it get?! He has developed the setup and tuning into pretty much of a "cook book" approach for the 650s. The following write up is basically what I learned from Jeff.
One word of caution! Jeff has informed us that the Hyper Charger may not work with an unmodified stock exhaust system. Either after market pipes should have been installed or the stock exhaust system should be modified to make it a more free flowing .
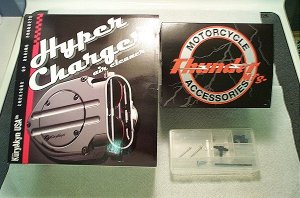 |
The Thunder Manufacturing order consisted of a Kuryakyn Hyper Charger, the Thunder Hyper Charger adapter for the VStar 650 and their Dynojet stage 3 jet kit also for the 650. |
The first thing to do is to open all the boxes to inspect everything and familiarize myself with all the parts. Having done that, You start to disassemble the bike. You first remove the speedometer housing and the gas tank. You remove the stock air cleaner housing and the duct that goes into the air box on top of the carbs. The lower bracket that is used to mount the air cleaner housing and the carb vent hose was also removed. The carb vent hose was left to hang under the carbs. The clamps that hold the air box to the carbs and the down duct to the air box are loosened. You have to fiddle with it but these two pieces will come apart and off the bike. Now, you are ready to begin the business of re-jetting and installing the Hyper Charger.
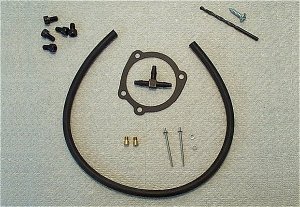 |
The miscellaneous hardware, jets and needles that are needed to re-jet the carburetors and install the Hyper Charger. |
You set out all the hardware parts that you are going to use. A pair of 128 jets, needles set with the clips on the fifth groove, two spacer washers, a "T" fitting and rubber hose, adapter gasket, drill bit and metal screw to remove the idle mixture plugs and 7, 6mm screws for mounting. The jet kit comes with 4 sets of main jets; 120s, 124s, 126s and 128s. The instructions suggest using 124 jets and set the needles on the 4th groove. Jeff recommends the 128s and the 5th groove for the needles. Go with Jeff's recommendation. Mikuni 120 main jet may also be used to substitute the Dynojet 128 main jet. Note that your jetting will depend on your exhaust.
You should remove the AIS and use a "T" to tie both intake manifolds together and then use the rubber hose that was included with the kit to connect the "T" fitting to the Hyper Charger. In the stock configuration, the front intake manifold tube is used to drive the AIS. The rear intake manifold is plugged off with a short hose and a plug. Replace the short rear intake hose with a piece of hose about 5 inches long.
 |
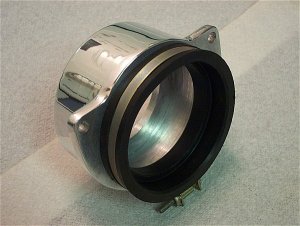
The parts that are needed to assemble the adapter and get it ready to install on the bike. The ring gasket must be removed from the back of the stock air cleaner housing. |
The ring gasket on the stock air cleaner housing is glued in place. A little gentle persuasion and it was removed. Clean the glue off the ring gasket with some Goo-Gone. In the picture above is the stock up duct that is removed from the air cleaner housing. You should shorten the drain hose that is attached to the bottom of the up duct. It should be shortened to about 2" to keep it hidden behind the Hyper Charger. The two black brackets are used to attach the adapter to the stock air cleaner mounts that are attached to the front and rear cylinder heads.
 |
 |
The adapter assembly is temporarily mounted to the stock up duct. |
The miscellaneous hardware, jets and needles that are needed to re-jet the carburetors and install the Hyper Charger. |
The ring gasket has a groove in it that fits over a lip on the back side of the Hyper Charger adapter. There's no need to glue it in place like the stock assembly. The fit is excellent so there is no leakage and it certainly isn't going anywhere.
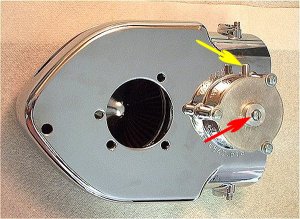 |
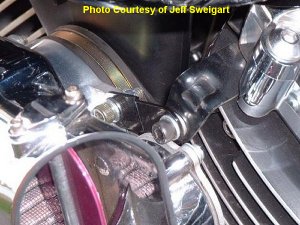
The back side of the Hyper Charger. |
Connect the "T" to the intake manifold hoses as described earlier. The vacuum hose included in the kit is used to go from the "T" to the Hyper Charger. The yellow arrow in the picture above points to the vacuum chamber inlet on the backside of the Hyper Charger. After mounting the Hyper Charger to the bike, attach the vacuum hose to this inlet.
The red arrow points to the butterfly adjustment screw. This screw determines the travel endpoints of the butterflies. This screw needs to be shortened or replaced with a slightly shorter screw. If left the original length, it will hit the cylinder fins on the front cylinder. The screw has to be shortened and the lock washer removed. If you gently hold the butterflies all the way closed and turn the screw in, you will feel it hit the butterfly push rod and the butterflies will start to be forced open. The length of the screw needs to be adjusted so that when the screw is fully turned down and seated the butterflies are open about 1/8" past the fully closed position. Cutting about 1/4" off the end of the screw should do it but a bit of trial and error fitting is recommended.
Mount the supplied gasket to the Hyper Charger adapter.
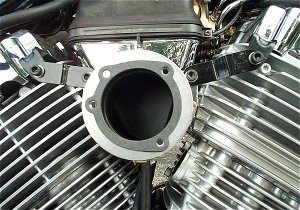 |
Here, the adapter and the up duct are being trial fitted to the bike. |
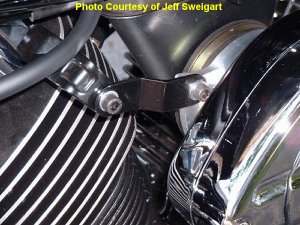 |
The left adapter bracket attached to the rear cylinder air cleaner mount. |
 |
The right adapter bracket attached to the front cylinder air cleaner mount. |
As you trial fit the adapter and mounting brackets to the bike, leave all the bolts and band clamps slightly loose. Don't tighten them down yet. Once the Hyper Charger is mounted to the adapter, you'll have to rotate and shift the entire assembly around a bit to make sure that it is on straight. Also make sure that the Hyper Charger and adapter are not bumping or rubbing against any of the engine surfaces.
Once you're satisfied with the fitment, tighten the band clamp where the up duct fits into the air box duct on top of the carbs. Next, tighten the band clamp on the ring gasket attached to the adapter. Remove the Hyper Charger and fully tighten all the band clamps and the bracket bolts. Mount the Hyper Charger again to the adapter and install the mounting bolts with medium strength LockTite. Don't forget the LockTite! The last thing you want is for one of these bolts to vibrate loose and be ingested into your motor.
Reinstall the gas tank and speedo assembly. Reattach all the fuel lines, put the seat back on, start her up and go for a ride!
Enjoy your new toy!
 |
It's done! |