OK, so I finally bit the bullet and converted my two carb Custom to a single carb manifold. I could not be happier!!!!
I had a difficult time finding any real helpful information on the conversion, besides what was listed on the KJS website or on eBay, and a couple other slightly vague sites. I decided I would share my experience, recommendations and other little trials and tribulations with my conversion process.
First after doing my internet research, I emailed both KJS and the gentleman on eBay selling the Vstar 650 Single carburetor manifold, seller name Searayguy321. I got a vague email back from KJS, more of a sales pitch than an informational email, I understand, they ask a lot for their product, they are proud of it, they don’t want anyone to copy it. Whatever. KJS immediately lost me as a customer when I received a response from Robert AKA Searayguy321. Robert was more than forthright, happy and able to answer all the questions I threw at him.
I spoke with Robert quite a bit prior to purchase, he is a wealth of good information, not to mention quite friendly and very helpful. He helped me with choosing the carburetor that best suited my needs and intentions for the conversion. He also assisted with a few recommendations for some of the other parts I would need for the installation.
Starting to get interested? Do a search on eBay for Vstar 650 single manifold and it should be the top item that pops up. This manifold is the same for the Vstar 650 as for some of the Virago model. The seller name is searayguy321.
I finally decided it was time.
I picked up the single carb manifold from Robert, for a reasonable $180 shipped to my door, included with the manifold were gaskets. Robert had made the carb flange to my order to fit my chosen carburetor. I bought a Harley Keihin CV carb on eBay for $50, with free shipping. Other items I had to buy were a new CV air cleaner $40, rubber CV carb flange $25, Harley V.O.E.S. 3 in Hg, $45, and a new fuel filter, $1, new main jet, $5, all items purchased on eBay. I also opted for the following, choke cable eliminator $20.00, air/fuel mixture thumb screw also $20.
Total cost was $386, without the extras I just wanted and HAD to have, the cost would have been just $346. It took a while and some patience to find the best deals and lowest prices for some parts, others like the VOES, just had to be bought at the buy it now price.
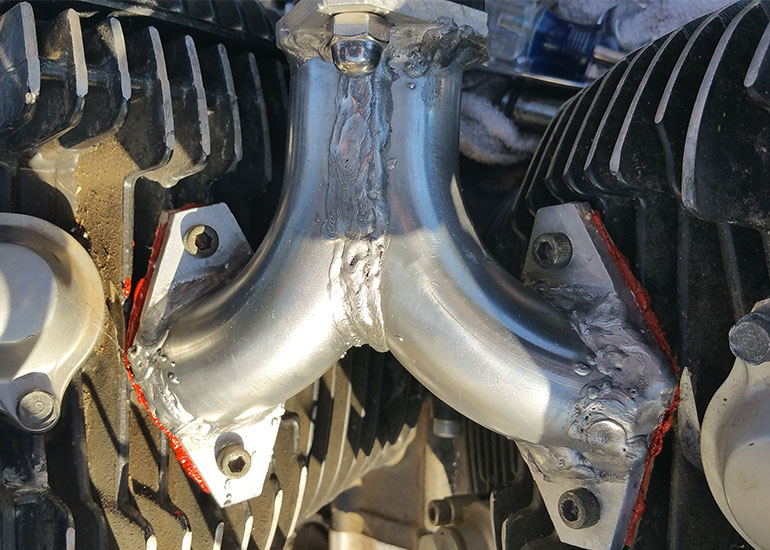
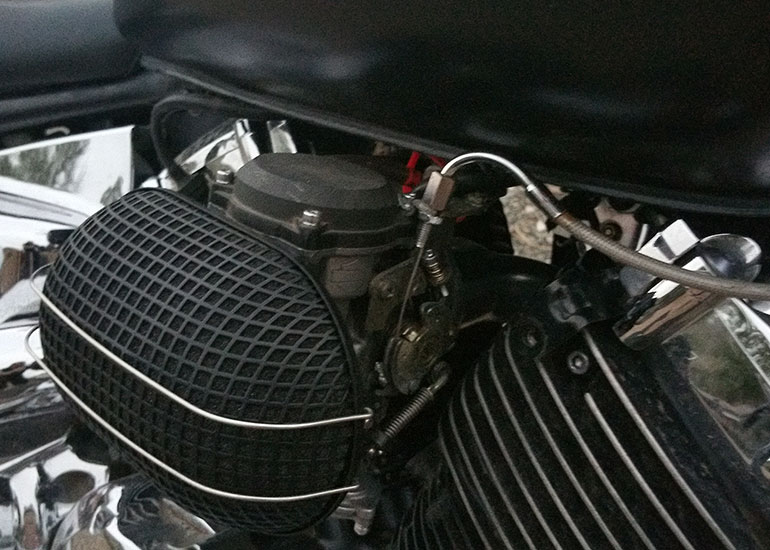
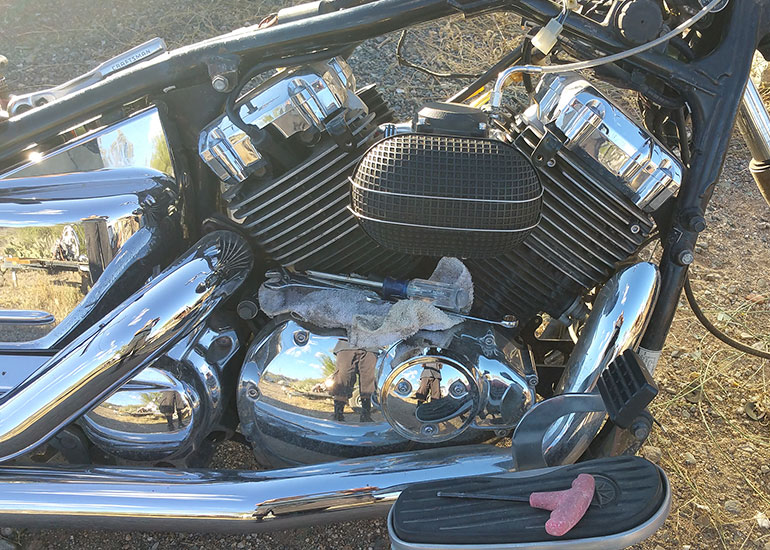
It took about 10 days or so to receive the manifold, which was just enough time to gather the rest of the parts for the project. The fit to the intake ports is right on, it takes a little patience, but the manifold fits beautifully in between the jugs. The manifold is definitely hand made, a little rough, but once painted black, it will be unnoticeable, behind the carburetor.
First fitting, everything looked great until I attempted to mount the Harley Keihin CV carburetor. The accelerator pump arm was making contact with the cooling fins on the front jug. I then decided to verify fitment with the fuel tank mounted. The bottom of the fuel tank rested on the top of the carburetor. I took a few measurements and photos, emailed Robert, explained what was going on. He responded quickly, asked that I send it back to him and he would rebuild it with new measurements, no charge. He then suggested I send the carburetor with the manifold so he could test it prior to sending it back to me. I sent both carb and manifold to him along with new measurements. He got to working on my new manifold. While he was at it, he went through my carb, replaced a missing seal from the accelerator pump, put in the right size pilot jet #48 and he modified the throttle cable bracket on the carburetor by drilling it out a little so the Yamaha throttle cable would attach easily. Robert also included a new set of gaskets to be sure I had what I needed.
I found out my first Grandson was on the way, and as luck would have it, Robert's shop was right off the freeway and we would be passing by on the way to and from. I made the arrangements to meet up at his shop to pick up the carb and manifold on my way out of town. I am SO glad I did. It was a wonderful experience meeting Robert face to face, to see some of his projects and to get to know the man behind the manifold. I left his shop with a huge smile and eager to get to work.
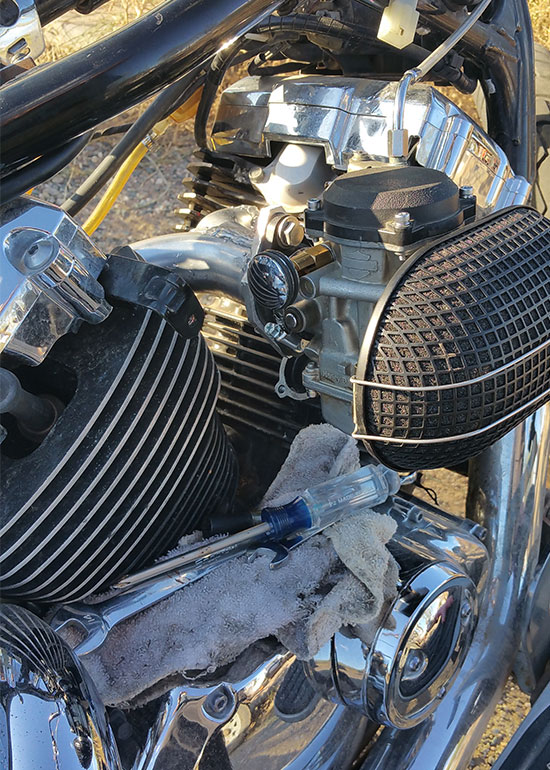
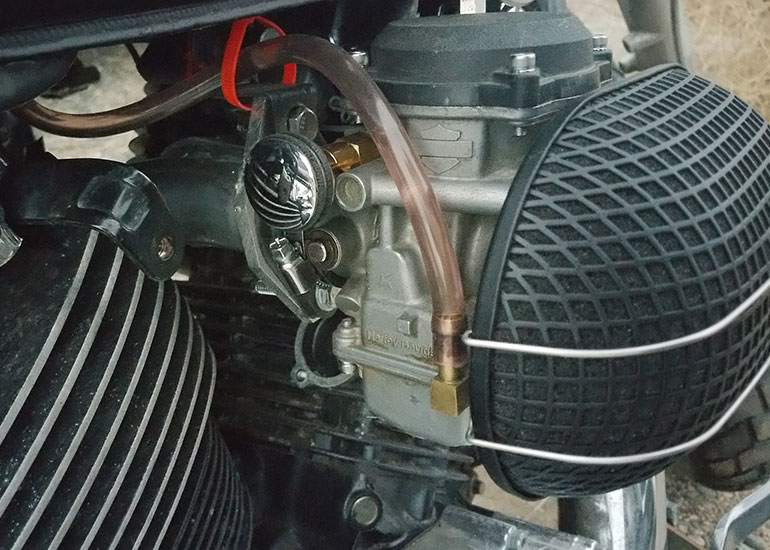
The new manifold fit between the jugs just as beautifully as the first, but now there are no clearance issues with the engine. Used RTV on the gaskets from manifold to head. Tightened down the bolts evenly to make sure of correct fit and seal. Bolted the rubber flange to the manifold, perfect fit no support bracket needed. Used a little saliva to lube the rubber and slid my Harley Keihin CV carburetor into place and tightened the hose clamp. I had a slight throttle cable clearance issue with the fuel tank, so I had to carefully make a few new bends in the throttle cable chrome tube and grind the step off the throttle cable bracket. I verified smooth unbound movement of the throttle cable, then adjusted the mixture screw to 1¾ turns out. I ran the fuel hose and filter from the fuel tank directly to the carburetor. The manifold sits the carburetor lower than the stock carbs, this allows gravity and the laws of physics to work, which in turn allows for the removal of the fuel pump. Unnecessary parts left out cost less and are more reliable.
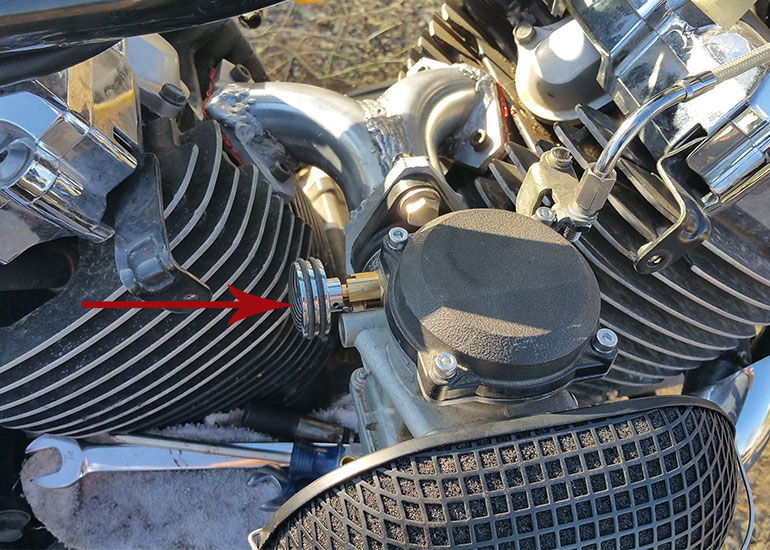
Now to install the Harley V.O.E.S., Vacuum Operated Electronic Switch; It is important to get the correct one, stock bore, aftermarket pipes, you want to use the 3 in Hg V.O.E.S., if you have stock bore, high compression pistons use 4 in. Hg V.O.E.S., if you have larger than stock bore, high compression pistons use 5 in. Hg V.O.E.S. Now if you are connecting the vacuum hose to the manifold and not to the carb, go up a size.
The V.O.E.S. comes with a mount bracket, mount it wherever you feel like, any orientation, it does not matter. I mounted mine to the manifold. I used a little RTV between the V.O.E.S. and the mount for a more solid feeling mount. Take the two wires from the V.O.E.S. and splice them into the YELLOW and BLUE/BLACK wires from the wiring harness that previously connected to your TPS on the old carbs. Run a 5/32in vacuum hose from the V.O.E.S. to the carburetor.
Then I mounted the air cleaner and fuel tank, connected the fuel line, turned the key and she fired right up! A little adjustment to the mixture screw, 2¼ turns out, and the idle speed and she was good to go.
Results of the conversion:
- NO MORE deceleration popping, none at all!!
- Snappier bottom end.
- Better midrange power.
- NO MORE clogged pilot jet from sitting just a few weeks.
- No carbs to sync.
- Easy access to carburetor without tank removal.
- No need for a fuel pump.
- Love the look.
Now the best part
I sold my carbs, spike air cleaner, OEM intake ductwork, and fuel pump on eBay
Cost of all necessary and unnecessary parts= $386
Money recovered from eBay sales after fees= $300
Total cost of project= $86
Hope this helps anyone else considering doing this conversion. I am absolutely thrilled and would do this again in a heartbeat. Wish I would have done it sooner.
Here is a few photos of the manifold and carb on the bike. I know I used orange RTV, it was to show where it should be used. It has since been cleaned up and the manifold painted.